Monday, July 5, 2010

Roomie Gifts!!

I have been very busy crafting this weekend. Boy, does it feel good to create!! I am pleased to inform you all that I finally finished my 'roomie gifts' for Convention this week. I am actually ready for Convention two days early! I am so excited about these gifts and can't wait to give them to my roommates as a thank you for putting up with me for a few days. Please forgive the glare on some of the photos...it was hard to get good pictures because of the shiny surface. I cannot take credit for this project (as usual). The idea and directions came from fellow CTMH consultant Beth Ivanic. (Thanks, Beth...your directions were fabulous!) Crystal's gift used an older paper pack, called Boom-di-ada, and pictures from Convention 2008 in Orlando. Stacey's gift used Cherry-O paper and pictures of her family. Enjoy!!


Friday, July 2, 2010

Riley Calendar

As promised yesterday, I want to share with you a gift I made for one of our retiring teachers. She loves the Riley stamps almost as much as I do, so I had no choice but to make her something with Rileys. I decided to make a perpetual calendar for her to keep track of birthdays, anniversaries, etc. I used a CTMH Display Album. I am only going to share photos of the front side of each page for each month. The opposite side was a page I made on the computer with the days of the month and room for her to write events. I used all CTMH paper for this project.

January (with Aspen paper)


February (with That's Amore paper)


March (with Stardust paper)


April (with Floral Tapestry paper)


May (with Emporium paper)


June (with Animal Cookies paper)
July (with Stardust paper)
August (with Tinkerin' paper)
September (with Animal Cookies paper)
October (with Game On paper)


November (with Grace paper)


December (with Jingle paper)

Thursday, July 1, 2010

Easel Card

This was a card I made a few weeks ago for one of our retiring teachers. She loves Riley stamps (who can blame her) so I knew I had to make her a Riley card. This easel card stands up and can be displayed after being given to the recipient. I used CTMH Animal Cookies paper, Stickease, Cranberry Grosgrain Ribbon, and Dimensional Elements on this card. As usual, Riley was colored with Copic markers. Needless to say, it was a huge hit! Stay tuned...tomorrow I will share the gift I made for her. You won't want to miss it!


Really?!?

Has it really been over two months since my last post?!? YIKES!! I am so sorry :o( Things here have been very busy, but I have been crafting...I just haven't had time to post anything. So...hang in there and I promise to post some artwork later today (and some more for the next few days too)!

Also...make sure you check in next week on Thursday, Friday, Saturday, and Sunday. I will be posting updates from the CTMH Convention in Washington DC. You definitely won't want to miss this! Convention is the premier event of the year and all of the big announcements are made there. I'm so excited to be going and will be sharing information (and maybe even pictures too) each night.

Sunday, April 25, 2010

Gift Card Holder

Isn't this the cutest stamp set?!? I think it is my new favorite set. There are four different bugs, including a dragonfly, firefly, ladybug, and this butterfly. There are also a few other word stamps in the set. It's called 'A Little Buzz' and it will be available in the Summer catalog, which goes live on May 1st, 2010.

I can't take credit for this project idea, but I do think it is awesome, and I will be using it quite a bit! My neighbor, Karen, was making these gift card holders for her son's teachers and I thought it was such a great idea I had to steal it. I used the Caboodle paper set, sorbet stitched ribbon, and copper brads. The image was stamped and colored with Copic markers. Then, I covered the entire image with adhesive and placed a used dryer sheet over the adhesive. Finally, I covered the dryer sheet with glitter and rubbed it onto the image. The glitter goes through the holes in the dryer sheet and sticks to the adhesive. The entire image has a softened, glittery look and the photos do not do it justice. Enjoy!


Sunday, March 28, 2010

A new twist on a picture frame...

Did you know that you can turn any picture frame into a dry-erase board? It's true! The glass surface acts the same as a dry-erase surface. This opens up so many possibilities for awesome boards! 

Here is my very first board. I made this for my niece for her birthday. It matches the name frame I gave her last summer and it will go great in her purple bedroom! I used the pattern Main Frame - Quilt Blocks from the CTMH Reflections book for the layout.

This frame is actually an LP record frame and it measures 12.5 inches x 12.5 inches. You can also buy 12x12 frames if you want to use a scrapbook page in the frame. Of course, any size frame will work...the possibilities are endless. The thing I love most about this project is that you can change the layout at any time. I hope you like this new twist on a picture frame!


Thursday, March 25, 2010

More Layouts!

Here are a few more Studio J layouts for you to check out! Hope you love them as much as I do. Keep checking back for more information about the launch of Studio J. Visit http://www.studioj.com for more information on studio scrapbooking!


Monday, March 22, 2010

More Studio J

I hope you enjoyed yesterday's peek at my first Studio J layouts. As promised, I am including a few more. I can't tell you how quick and easy these are to make. I am eagerly awaiting my package to see how they look in person. Rumor has it that they are fabulous!! Enjoy :o)

Visit http://www.studioj.com for more information on studio scrapbooking! 


Keep checking back...I have more to share!

Sunday, March 21, 2010

Introducing Studio J!

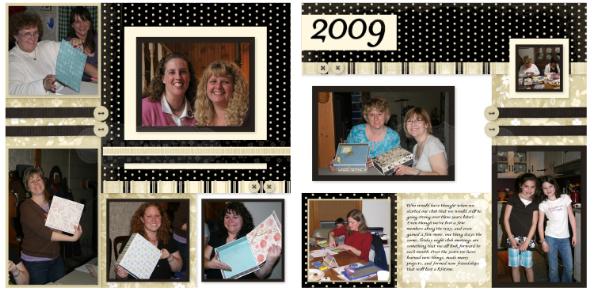
Close to my Heart has always been on the cutting edge of scrapbook innovations. Let me tell you...they've done it again! Coming soon, customers will be able to create their very own digital scrapbook pages! 

For more information on Studio J, visit the Studio J website at http://www.studioj.com.

More details will be coming in the near future, but in the meantime, I wanted to share a few layouts of my own. I've created ten 2-page layouts in a matter of a few hours. Studio J is quick, easy, and the results are fabulous! I'm sure you will agree. Below are a few of the layouts I've created...keep checking back, I'll be posting more later!

Click on each image for a better look!


Thursday, March 4, 2010

Riley Thank You Card

Last night I dug out my Riley stamps and made a thank you card for a colleague. Our technology director was a huge help in making the arrangements for me to attend the state technology conference in Hershey last week, so I wanted to make him a card to show my appreciation. I used all CTMH paper and colored the image with my copic markers. It's hard to see on the photo, but I added liquid glass to the computer screen. The card is super-cute in person (of course, I think anything made with a Riley stamp is super-cute!) For more information on Riley stamps, go to the Riley and Company Website.

CTMH Products used: Tinkerin' Level 2 Paper Pack, Twilight Cardstock, White Daisy Cardstock, Sunny Yellow Cardstock, Card Chatter-Thank You Stamp Set, Assorted Buttons, Hemp

Other Products: Cyber Riley 

Another CD Case Project

Sorry I've been MIA for a while. The last two weeks have been super busy. I attended a conference in Hershey for five days, and have been catching some girls' basketball games. Our local high school team has been making a pretty good run in the playoffs. They won the league title two weeks ago and are playing for the district title tomorrow night. I finally had some time to make a few things last night. First, I made another CD Case Project as a favor for a friend. This is the same idea as the one I posted a few weeks ago with different paper.

Front Cover


Back Cover


Inside


CTMH Products: Stardust Level 2 Paper Pack, Across the Board Rub-ons

Other items: Calendar, CD Case

Monday, February 15, 2010

More Basketball Layouts

I love having days off from work to craft! I wish I had more time to work on my growing list of projects to do, but it seems like there is always something more pressing to do. (Of course...I guess we all feel like this most of the time.) I'm trying to make a better effort to work on projects more often, so we will see if that works out for me or not ;o)

I was able to get quite a bit done today. Below are some framed layouts I made for my some of my niece's teammates. This coming Saturday will be their senior recognition night and this will be my niece's gift to the seniors on her team. Each frame is 11 x 14 in size. This is probably the first project I have made in quite some time that has not used much CTMH product. I used textured burgundy and orange cardstock on each of the sides. I used CTMH white cardstock for the center section and as the matting around each picture. I also used basketball textured paper from The Paper Company in the middle section. The tags were cut with my Cricut and I used basketball brads on each tag. (FYI - There are three Samanthas on the team, so each girl has a nickname to tell them apart...hence, Samma!) The basketball net and ball on the left hand side is a Jolee's dimensional sticker.


Thursday, February 11, 2010

Wedding and Sympathy Cards

Yesterday I was able to find some time to make a few cards thanks to the snowstorm. I officially measured 20 inches in our backyard last night. That was a far cry from the 8 to 10 that was forecast for our area. According to the news our county was the hardest hit from this storm. So...after spending half the night trying to find my car I worked on these two cards that I needed to make for this weekend.

I also tried my hand at a new technique. My upline, Nancy Brown, has been doing stitching on her cards for a while now and it always makes her cards look so elegant. You can see some of her gorgeous work on her two blogs, Creatively Artsy Card Gallery and Inspired by Stamps. I decided to give her a call last night to get some tips on how it is done. Although I was scared at first, I have quickly fallen in love with this technique! I'm going to find it hard to make cards without stitching on them now. (Thanks, Nancy!) I absolutely love what stitching can add to a card.

This wedding card is for some very close friends of ours. They have been together for over ten years and are getting married on Saturday. The card measures 6 in x 6 in. I used the CTMH paper pack Silhouette, along with the Childhood Portrait stamp set. The image was stamped with black ink and then embossed with clear embossing powder. The sentiment is from the For Every Occasion stamp set. The flowers on the sentiment are from a corner punch. The stitching is done with two strands of black embroidery floss.


The sympathy card idea was basically copied from my upline. The only exception is that my card is a 6 x 6 and I changed a few minor details. I used the Bella paper pack from CTMH. The stamps are retiring sets from Sweet 'n Sassy Stamps. The cross is from the set called Elegant Blessings and the sentiment is from Forget-Me-Not. These stamps will only be around while supplies last and they are currently 50% off! The stitching is done with brown embroidery floss. The ribbon is CTMH Hollyhock stitched ribbon.  

Sunday, February 7, 2010

Basketball Page

One of my favorite things to do is watch girls' basketball games. When I was in high school, I kept statistics for my high school girls' team for three years. Lately, my husband and I have been following the Tamaqua Lady Raiders and the Susquehanna University Lady Crusaders. I started watching basketball seven years ago when my niece was the starting point guard at Tamaqua. Since then, we have watched her play almost every game in her high school and collegiate career. After she graduated from high school, we kept watching the Tamaqua home games. As an alumni of the school and a teacher in the district, I enjoy supporting our local school athletics. 

On January 28th, one of our starters scored her 1,000th career point. She is only the third junior in school history to reach this plateau. On that night, I took a ton of pictures with the intention of giving them to her parents. Once I got home I decided to make her a framed scrapbook page. Below is the final result before it was framed. I was so happy with how it turned out and her family loved it!


CTMH Products Used:
Game On Level 2 Paper Pack/Stickease
Colonial White Cardstock

Other Products Used:
The Paper Company Textured Basketball Paper
Basketball Ribbon (Michael's)
Basketball Brads (Scrappin' Stuff Sports - Online)

Wednesday, January 20, 2010

CD Case Calendar/Photo Frame

I think I have found a new favorite project! This would make a great gift for any occasion. This is the project I will be doing with my monthly scrapbook club this week. All you need is a new or used CD case (a thicker case, not thinline), some paper, and a few photos. When the case is open on a desk, it is a calendar for the user, and a photo display for the rest of the world. The pictures are from my sister and niece's trip to the shore this summer.

Front (Case Closed)


Inside


Back (Case Closed)


Outside
CTMH Supplies Used
Caboodle Level 2 Paper Pack, Caboodle Stickease, Crystal Blue Buttons, Colonial White Waxy Flax, Creme Brulee Paper Flower, Colonial White Suede Pinwheel, Filigree Charms

Other Supplies
CD Case, Calendar (found in the dollar bin at Michael's)

Envelope Purse

A few months ago I saw this idea while looking for projects on the web. The original project can be found by clicking this link to Stamp Paper Scissors. I adapted the project to fit my own ideas and to accommodate stationary sized envelopes. I love this idea and have been meaning to try it for quite sometime. I finally got around to creating this envelope purse with pictures of my niece. The left and right side of the open purse are stationary size envelopes that have been covered with paper. The project is a lot of fun and it's nice that the envelopes contain areas for hidden pictures or journaling.

Purse closed
Purse Open


Purse Open to show hidden panels

CTMH Products Used
Bella Level 2 Paper Pack, Bella Stickease, Twinkle Brads, Eyelets, White Organdy Ribbon

Flip Flap Photo Book

This photo book was created using CTMH Flip Flaps. I used seven flip flaps for this project. The front and back cover were created using the Key to my Heart paper pack.


CTMH Products Used
Key to my Heart Paper Pack, Flip Flaps, Spring Bigger Brads/Accents, Creme Brulee Ribbon, Token

Name Frame

Okay...so I know that my posts have been non-existent for a while. Part of this is the fact that I have just been so busy. I have been making projects and taking pictures but haven't gotten around to posting. It has been tough to adjust to the idea of blogging. I promise to try harder from now on! As a way to make up for being missing for so long, I will be adding several posts today to share some of my recent creations.

This is a project that I made for my niece when she painted her bedroom. Her room is purple now and these papers matched perfectly. The letters were cut with my Cricut and then covered with colored glitter. I just love the Martha Stewart brand glitter. The colors are so vibrant! The project was framed in an 11 x 14 cherry picture frame, but I forgot to take a picture after it was framed.


CTMH Products Used
Bella Level 2 Paper Pack, Autumn Paper Flowers, Clear Sparkles, Chocolate Ribbon, Colonial White Spiral Clip, Colonial White Ribbon, Smoky Plum Bigger Brad